Tuesday, April 7, 2015
Owl hats
I love crocheting quick projects. I get to make something and also feel the satisfaction of a finished project. My sister in law found a cute owl hat on Pinterest that she liked. She asked if I could make one for their new baby and her older sister. Nothing like creating down to the wire... I was putting the finishing touches on as we pulled into the hospital to visit my beautiful new niece! I can't wait to see the big sister in hers too!
Friday, May 23, 2014
Chevron Baby Shower
My husband's family is pretty big, and rapidly expanding even more! I had so much fun working on the decorations and cupcakes for a baby shower that we recently had for one of his cousins. Enjoys some pictures!
Wednesday, February 13, 2013
Valentine's day pjs
I used my serger for the first time and loved it! I used this tutorial: http://mycottoncreations.blogspot.com/2010/07/christmas-eve-pajama-pants-tutorial.html?m=1
It was so easy!
It was so easy!
Wednesday, October 17, 2012
Hats, Hats, Hats
I am in love with Hats :) Check out my new kitty hat and the girls having fun. My next project is going to be a Mike the Knight hat for my cousin's son for Halloween. Wish me luck!
Sunday, September 23, 2012
Trying to blog from my cell! Test :)
I am trying to see if I can use my cell phone to add posts. Thus is where I take pics and my iPad sprang't really let me post! We will see how this does:)
Just a peek at a scrapbook layout .... More will come if this works :)
Tuesday, June 19, 2012
Elephant Granny Stripe Baby Blanket
Wow, it has been a long time since I have posted on here! I am going to try to start checking off some of the projects on my list, so I hope to put a lot more out here. I just finished crocheting two (well the second is almost finished) baby blankets. I have been really inspired by the blog Attic24. I love her use of colors (or should I type colour since it is an English blog :)! Lucy is very talented on her ability to create projects and write patterns. I have also viewed a flikr pool where people have posted projects that were inspired by her blog. I loved one of the blankets that I saw that used gray and pink! The colors looked wonderful together and I couldn't resist starting a blanket of my own.
After I started my blanket, my cousin Laura told me that she was doing her baby nursery in gray and pink with elephants. My mind started whirling... how could I crochet an elephant and applique it to the blanket. This is what I came up with. (I did look for a pattern on the internet and couldn't find something I wanted!) I think that it turned out great if I do say so myself. (Even if my oldest (4) told me that she thought that it was a duck. haha.)
***Excuse the pictures, they are from my cell phone. I was too excited to give baby Taylor the blanket that I didn't wait to take better pictures!
Saturday, November 5, 2011
Turkey Hats
The new baby should be here soon! I decided that I wanted a turkey hat (as hopefully it is here before Turkey day!). I found a pattern on Etsy and off I went. My problem is that I have started about 5 hats, and haven't put them together yet. (I had to buy a lot of yarn for 1 hat and I wasn't sure on the size, so I just kept making them!) Here is a pic of the first! (I made a older hat size also ;)
Tuesday, August 9, 2011
Girlie Dinosaur Shirt
So there aren't many dinosaur shirts out there for girls. At least not cheap ones :) I found a photo or two online of girlie shirts with a dino on them so I decided to give it a whirl and make it myself. EASY PEASY! No step by step photos like some fancy blogs, just my good 'ol written instructions:
Need:
cotton shirt (I found mine at Walmart for $2)
cotton or knit fabric---like the smallest amount you can cut. Even scraps if you have them since it's for a kiddie shirt.
Wonder Under
Cutsie hair bow (I found mine in the ribbon aisle at Joann fabrics. They come in a pack of like 6 for less than $2)
Needle/thread/sewing machine
Follow Wonder Under instructions. Trace image you are going to applique on the paper side of the wonder under after you fuse it to the fabric. *NOTE* When you trace on the back of the wonder under, be sure your image is "flipped", like mirror image on the computer since you'll be using the right side of the fabric for the applique and that is on the other side). Cut out image. Follow wonder under instructions to fuse it to your shirt. Zig zag around the applique once it's fused to the shirt. (I used a cotton fabric so the edges would fray if I didn't zig zag, but if I used knit fabric I would have just done a straight stitch close to the edge of the fabric since the knit won't fray). I suppose depending on the shape of the applique you choose, you could just hand stitch it as well. I hand sewed on a little tiny bow in the dino's "hair" so you have NO DOUBT she is a girlie dinosaur! All done.
Next time: I'll use knit fabric, I think it might be cuter. I'll also use a little bit brighter thread, you can hardly see the pink zig zags in this photo. Sometimes the stitches are just as cute and make the project look cute! I do happen to have an extra white tank top for Sydney too...and another dino, already cut out... :)
Monday, July 11, 2011
Easy Skirt
My 3 year old daughter is skirt crazy. That is all that she wants to wear... I haven't even bought any shorts this summer as she will only throw a fit! When I saw this tutorial on www.dana-made-it.com, I knew that I had to make it. It was so easy that I have multiple plans going on in my head for more! And I learned how to zigzag seams to make them not fray! Love it! I can't wait to get some fall material and make up some for preschool this fall!
My daughter LOVED it! We are having a hard time getting it washed as she wants to wear it every day :) I went to Walmart and found some basic white tanks to go with it for $2 each... You can't beat it!
Saturday, May 7, 2011
Party Decorations
I just did THIS fun and easy craft for Sydney's upcoming birthday party. It was the best: 1. cheap 2. easy 3. INSTANT gratification!! No waiting for stuff to dry, no pinning here and pinning there and waiting for something to come together. You sew, you see the crepe paper ruffle up. While I was at the Goodwill today (shocker.) I found a gallon size ziplock bag with some new and half used colored crepe paper for .69. I thought, hey, I'll give this a shot for less than a buck. Awesome! I'm going to buy more tomorrow! I'll post some pics after the party when I have them up.
Tuesday, March 15, 2011
A Few Easy Crafts
So, I have several little crafts that I'm going to post. Nothing fancy by any means but just easy stuff plus one kiddie craft. Here we go:
EASY RIBBON HEADBAND
I did this in like 15 or so mins at my most recent MOPS meeting. It is just a ribbon and two hair elastics "tied" together. I measured my head with a sewing type tape measure just where I wanted the headband to be on my head. I then subtracted 5 inches (Next time I'll do six, it's a bit loose) and cut the ribbon. Take two hair elastics and attach them together by looping them around eachother (kind of hard to explain but look at the pic for more detail). Take one ribbon end and fold over the hair elastic. Hand sew in place. Do the same for the other side. THAT'S IT! I think I'll be picking up some of these elastics at the dollar store and then some ribbon by the yard at Hobby Lobby this week. I can think of lots of different types of ribbon that would look cute!!
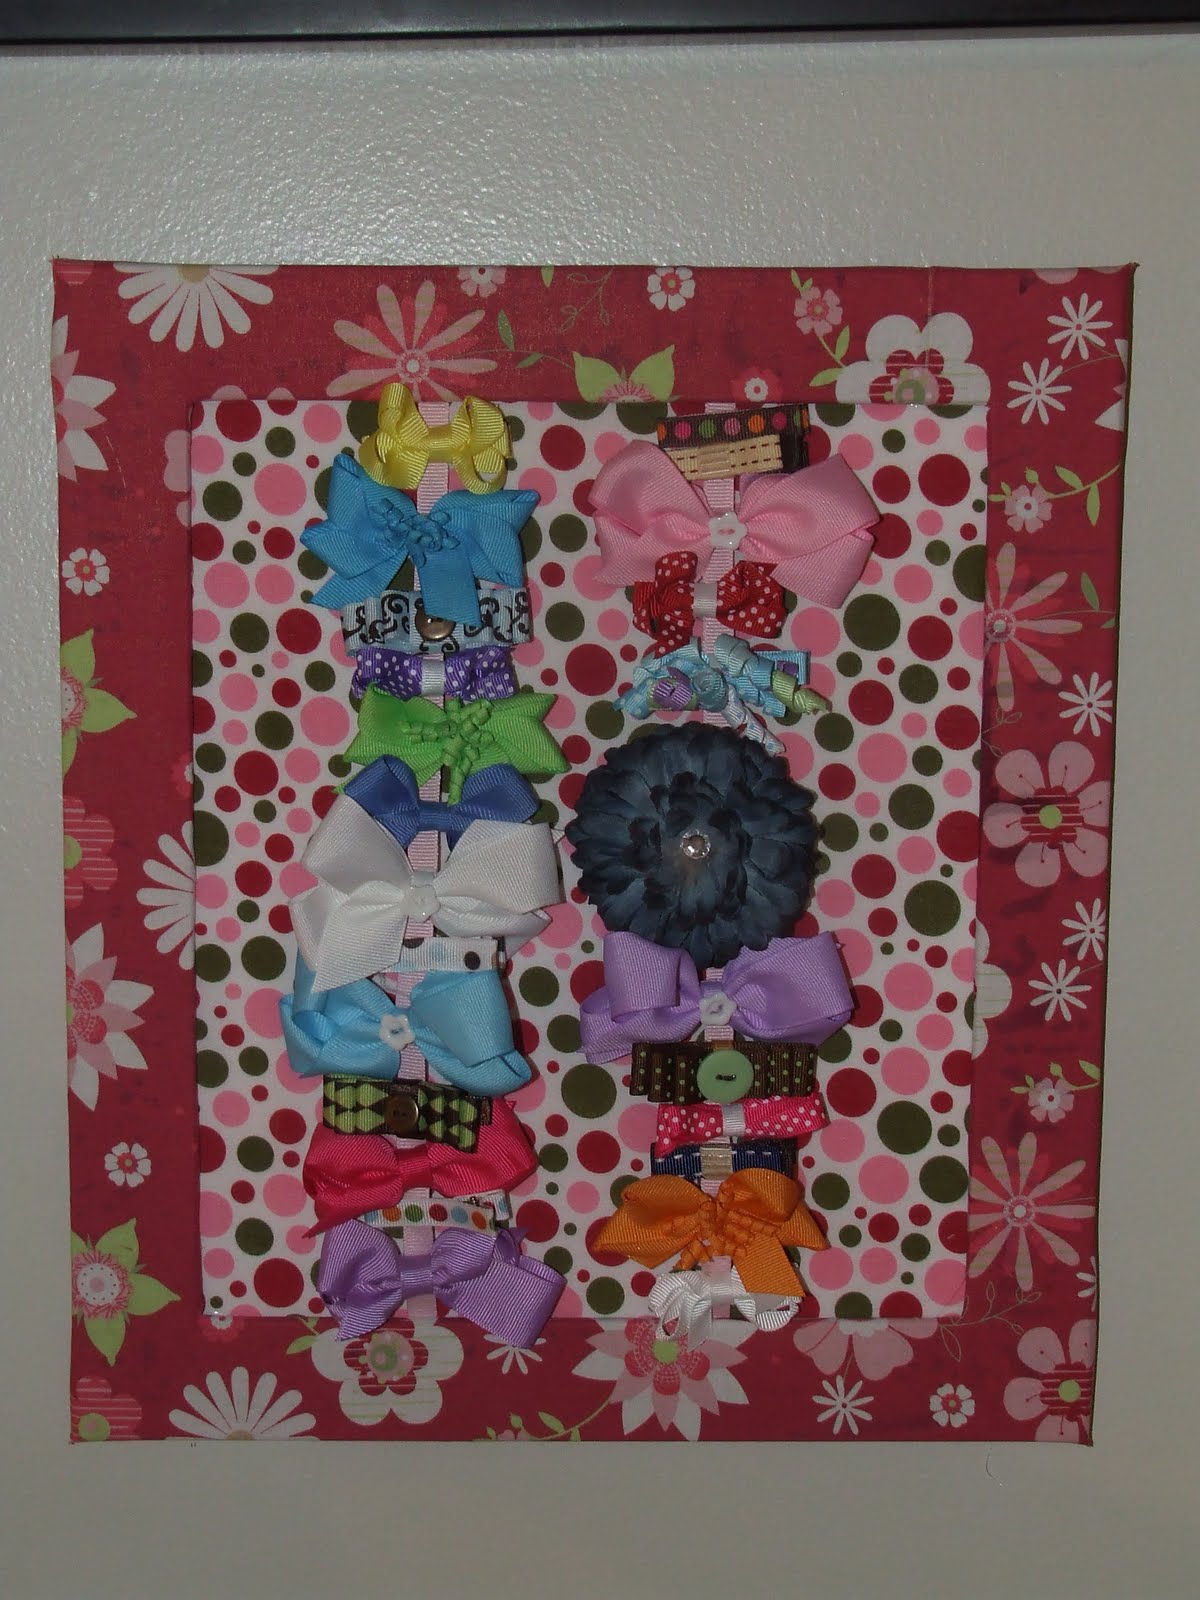
HAIRBOW RIBBON HOLDER
This was super easy. Having said that, I made some mistakes along the way that I'll do differently the next time around. Yes, there will be a next time around. This is obviously too small for the current amount of Sydney's hair bows. I used this tutorial but made some of my own changes. Instead of Mod Podge I used my trusty hot glue gun. I'm not really sure why you'd fuss with the mess of Mod Podge with this project. I suppose if you want a satin type of finish on the frame? I don't know. Nicole? You are a Mod Podge girl, do you know? Anyway, I just cut like it said (except I cut right through one of the sides so it is pieced together. I started with Mod Podge but I didn't think the fabric "stuck" very well so I just started hot gluing instead and it worked fine and less messy. I hot glued the ribbon (I will add one more when I do it over). This is like a 20 minute craft. Too bad it was my second frame (1st one not big enough and not "flat" enough) and I paid too much for the fabric (should have used a coupon but Hobby Lobby doesn't accept competitor's coupons (they are so much closer than Joann's). I'll stop complaining now....I like how it turned out, really!
Kole LOVES to use glue. I looked online for a craft to do tonight and found an idea of sewing two felt shamrocks together and tying a ribbon at the top. I figured I'd cut out two felt shamrocks, put some watered down glue in a bowl, hand Kole a foam paint brush and have him "paint" glue on the shamrocks and then put them together. I precut a slit through both shamrocks so we could put either a ribbon or a pipe cleaner through and hang it up. Kole added some green and white pony beads (which is his new favorite thing to do; stringing beads. The pipe cleaner works great since its a little sturdier for his little hands). Twisted the pipe cleaner around to make a loop and then added some glitter glue for fun (Koley wanted random shapes so he held the tube while I squeezed and guided his chubby fingers). He thought he was so cool! I think we'll do some easter eggs like this too and maybe send them out to the grandparents!
So you know how I LOVE the Goodwill stores, right? My new favorite thing to look for is ribbon. I found an entire spool of cute pink grosgrain tonight for $.59. I've found some other spools here and there as well, sometimes full sometimes half full. For less than a dollar, it's worth it!!
Thursday, March 10, 2011
New Purse!
I did it! I finally made a Buttercup Bag that I found on Made by Rae. I love it. I think the next one I'm going to have to use heavier interfacing to make the magnetic snaps sturdier, but I think that this turned out great for the first try! I did use this tutorial which was very helpful!
Friday, March 4, 2011
Yummy Recipe with a "New" Ingredient
So...have you ever tried Jicama?? I've heard of it but never gave it much thought. I became friends with a person from high school last week on Facebook and she has a website/blog that she documents what she and her family eat for dinner. One of her "recipes" (she doesn't usually post the actual recipe, just what she put in the dish) looked yummy and I thought I'd give it a whirl. If you don't know, I STRUGGLE in the kitchen so this was out of the box for me. Anyway, I made it and it was DELISH!!! Here is the "recipe":
Chicken and Jicama Wraps with Spinach and Avacado
*The key is the jicama slaw. It's best when you let it sit in the fridge for a couple of hours or even overnight*
SLAW:
1/2 to 3/4 of one large Jicama cut in small cubes. up to 2 colored peppers cut in small cubes.
a couple of tablespoons of minced fresh ginger (don't use the dried kind). a couple of tablespoons of lime juice. a tablespoon or so of chili powder. green onion, finely diced. cilantro. a couple of tablespoons of mayo. salt and pepper.
I used rotisserie chicken shredded up with a tiny bit of cheese and put it on a whole wheat tortilla and warmed it in the microwave for less than 30 seconds. Add some spinach leaves to the wrap and top with the slaw and a slice or two of avocado and wrap it up. YUMMMM!!!
Sunday, February 27, 2011
Check it out... I won
Check out my other blog,I don't want to repost ;) , but I do want to say that I finally won something!
http://thursdaynightsupper.blogspot.com/
Friday, February 25, 2011
Nicole inspired me
So, those veggies inspired me to link this recipe (for some reason I cannot copy and paste anything into blogger lately). They are Kole's favorite treat and really healthy believe it or not. We call them "cupcakes" but really they are muffins made with carrots (hence the inspiration from the veggies), whole wheat flour and dried fruit. I take most of the dried fruit out and use raisins instead and add small amount of mini chocolate chips for an extra treat ;) I use HALF the sugar it calls for and use HALF the oil it calls for but replace the other half with UNSWEET applesauce. Shredding the carrots is the most time consuming but if you use the shredding blade on your food processor it goes by quick! I like to bribe Kole with a cupcake so he's a "good boy" or he eats all of something that is on his plate. It TOTALLY works and I am NOT above bribing my kids at this point.
Enjoy!

Kole says, "mmm...cupcake taste good." Yes, he requests a crown when eating cupcakes most days when we are home. He must feel EXTRA special :)
Enjoy!
Kole says, "mmm...cupcake taste good." Yes, he requests a crown when eating cupcakes most days when we are home. He must feel EXTRA special :)
Non-craft post - CSA
I'm so excited! I have talked Chris into joining a CSA this summer. We are going to buy a half share from Visser Farms. I bought a 'box' from there today so that I could see how it would work and so that I could talk to them. Here is a peek at what we received today and I can't wait for the weather to get nice and we can start enjoying all of our great produce! Why am I going this route? Why don't I just buy what we need either at the store or the local farmers market? There are a couple of reasons...
- I love veggies and want to try some that I normally wouldn't justify buying.
- We really want to be better about eating at home. I think that by having the produce at home, I'll feel like I 'need' to use it and it will be an incentive to cook.
- I hope to create excitement for the girls about healthy food by exposing them to the farm and hopefully they will be excited to see what we will have each week in our box!
Thursday, February 24, 2011
Tee Shirt Transfers
Guess where we are headed on Saturday?? Naturally, I made larger ones for Seth and I. Pain in the neck though....all the cutting out gave me a cramp in my hand! Plus, I should have known better than to buy transfer paper from Walmart (but I was already there with the kids and didn't want to make a trip to Hobby Lobby) because it sucked! One piece got jammed in the printer, one was stuck to the package and ripped a little and was VERY fussy while cutting the small parts out. Not to mention that the colors ran. Oh well, it turned out fine I guess and it'll work for Saturday. Bummer I had to use gray but that was the only color I found that had ALL of our sizes. Better than plain white I guess :)

PS: I LOVE the Buttercup bag, I remember seeing that before and thought it was cute. You might have to "whip one up" and let me know how it goes. I like the two buttons on the front of the bag. I've used her baby tights tutorial before for Sydney's leggings (or at least the general idea).
What to do...
I just bought a fat quarter pack of Dolce from Free Spirit.
What should I make with it? I'm think that I may make a quilt, but I also have enjoyed looking at the buttercup bag. Any other ideas?
Wednesday, February 23, 2011
Taggie Owl
My taggie owl project is a little old. I made them about a year ago, but to follow up to Jen's post, I thought that it would be fun to post them! Let me preface this by saying that I'm addicted to blogs. Specifically craft and recipe blogs. (I really think that I have Jen to thank for this! She introduced me to Jill's blog at www.homemadebyjill.blogspot.com and from that it just escalated. I don't know about you, but if I jump on the computer, it seems like it is easy to just keep clicking and find new things all the time. I will get on for a couple of minutes before I go to bed and before I know it, it is 1 am and I have been on the internet for three hours! Well, to get back to the taggie owls, one night I found this tutorial on www.lubirdbaby.com and fell in love! It is funny because I was reading Jen's post and I too had a reject owl... I gave it to my older daughter... she thought it was great! (I felt better... that poor little sad owl wasn't rejected anymore!) I did make a few changes. I didn't use and interfacing and I had to make the owl a little bit larger. I tried using the pattern and it just didn't turn out right! (The first guys is my 1st attempt. I wasn't quite happy with it!)
Monday, February 21, 2011
Owl Teether
So I thought these owl teethers were super cute so I decided to make a couple. Easy enough, right?? Why do the easiest things take me FOREVER to make??? It should have been a 30 min. project and it took me a couple of hours!! And, they didn't turn out like I wanted, either. One is okay and the other one has major issues and will be thrown away. Boo.
Here is what it was supposed to look like. I think my ribbons are too long and since I had to turn it right side out, I now have a stitch line at the bottom of the owl. Double boo. I even put a "crinkly" in there---a thoroughly washed portion of a Dorito chip bag :) It works well for that crinkly sound :)
Oh, well.
Nic, didn't you make these??? How did yours turn out???

~Jen
Subscribe to:
Posts (Atom)